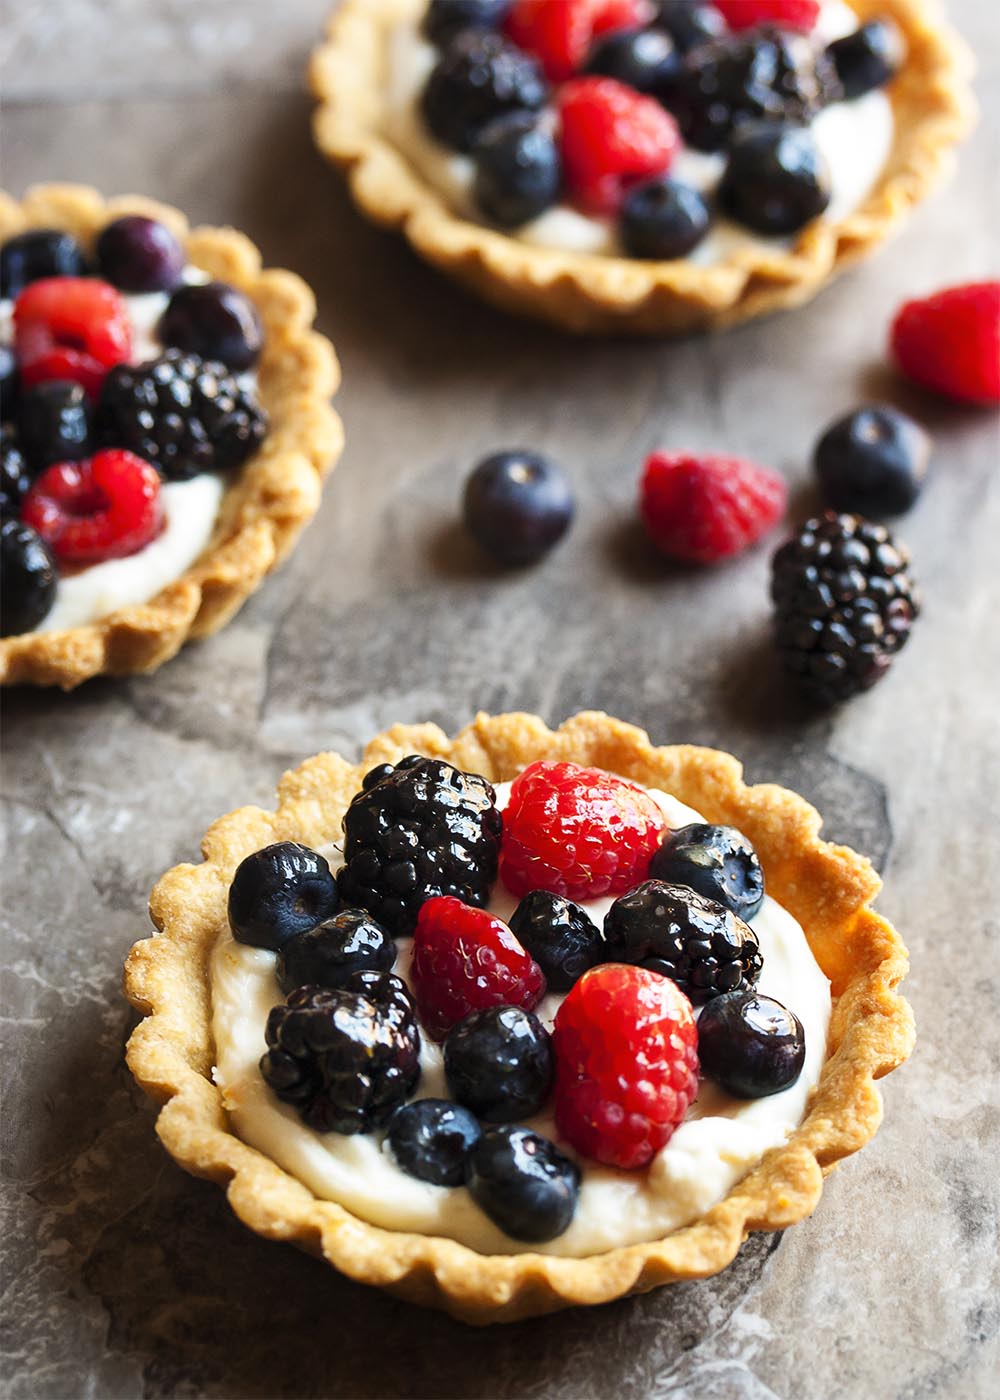
Mascarpone fruit tarts are perfect little individual desserts which are as delicious to eat as they are pretty to look at! Roll out the pastry and bake up the shells ahead of time and then fill them when you are ready for dessert. Creamy filling below, jewel like fruit above, this is a dessert which will impress.

Hello, all!
As I write this Easter is coming soon and I need a dessert!
One thing I love for dessert at Easter time is cheesecake. I don’t know why, but they go together for me. (See my Cheesecake Pudding which I’ve served at Easter for proof!)
Another thing I love all the time is fruit desserts. Give them all to me!
So, when I was thinking about what to post as a dessert this month, my mind went to cheese filled fruit tarts, and, as it will my mind continued onto a mascarpone fruit tart. I’m happy my mind went there, because these mascarpone filled tarts are exactly what I wanted.
Now, the development of this recipe isn’t exactly as a straight a line as it sounds.
First, I thought why not just make a cheesecake? I make a pretty awesome cheesecake and I love the recipe, and then I thought, no I need fruit, so how about a custard filled fruit tart? So, I started working on a custard. Which is when my custard making skills decided to leave me. Usually it’s all good, but twice in a row it did not work.
And then came the vision of mascarpone filling and all was right with the world. Maybe it was a sign that I should stick to some form of cheesecake or cheese pie when contemplating Easter desserts! I’m not going to argue.

Since I had decided to make a tart, the next thing to work on was making a tart shell.
There are various options, but I like a pate sucree in this sort of tart. It’s a fairly friendly sort of dough since it’s forgiving and easy to work with, and you can either roll it out or pat it into the tart pan.
One thing I will note is that while some recipes call for two egg yolks, I don’t recommend that. I find two egg yolk recipes to be sticky and annoying. However, one egg yolk is very nice and makes it easier to work with and roll out. It still can get a little fiddly if you are making a large tart and haven’t worked much with pastry, but remember that it can be patted in place too!
If you are making the mini-tarts, it’s a breeze to roll out. A moment for each and I was done.
Of course, my mini-tart shells aren’t nonstick and don’t have removable bottoms, so there was a trade off between easy rolling and cutting out little parchment rounds. 🙂 Here’s a great video that shows you how to do it quickly. Luckily, I don’t mind doing these sorts of things when it comes to dessert, especially when it means I will get my very own tart that I don’t have to share.
Once I had the tart shell and a mascarpone filling, I was almost there though a few questions remained.
- How should I sweeten the filling? The answer was my favorite natural sweetener – maple syrup. It brings sweetness and flavor to the party.
- Did I need to lighten up the filling a little? The answer was yes which meant, folding in some whipped cream.
- Should I brush some glaze over the top? Definitely. A little apricot jelly warmed up and mixed with some water made the perfect glaze.
Now I had all the elements for a truly excellent fruit tart.

If you try my recipe for Mascarpone Fruit Tarts, I would love to hear from you in the comments with your experience and rating! And I’m happy to answer any questions you might have.
– Happy Eating, Annemarie

Mascarpone Fruit Tart with Mixed Berries
Ingredients
Pate Sucree
- 1 1/2 cups all-purpose flour
- 3 tbsp superfine sugar
- 1/4 tsp table salt
- 8 tbsp unsalted butter, cut into 1/2 inch chunks
- 1 egg yolk
- 3-4 tbsp heavy cream
- 1 tsp vanilla extract
Mascarpone Filling
- 6 oz mascarpone cheese
- 3 oz cream cheese
- 4 tbsp maple syrup
- 3 oz heavy cream
- 1 tsp vanilla
- 1 tsp orange zest
Fruit Topping
- 2 cups berries, mixed blueberries, blackberries, and raspberries
- 1/3 cup apricot jelly
- 1-2 tsp water
Instructions
- This recipe makes 1 9-inch tart or 6 3.5-inch mini tarts.
Pate Sucree
- Make the dough: Add flour, sugar, and salt to a food processor. Give the dry ingredients a whirr to blend them.
- Add the butter. Pulse for 5-6 one second pulses, or until the butter is cut it with no large chunks remaining.
- Add the egg yolk, heavy cream, and vanilla. Blend for 30 seconds.
- The dough should begin to ball up and come together. If it still looks dry, add one more tablespoon of cream and pulse a few times to mix it in.
- Chill the dough: Once the dough has begun to come together, transfer the dough to a bowl and use your hands to shape it into one disc for a 9-inch tart or 6 discs for mini tarts.
- Cover the disc with plastic wrap and let chill for 1-2 hours, or up to 3 days. If chilling more than 1 hour, let the dough warm up a little and become pliable before rolling.
- Roll the dough: Before rolling out the dough, butter each of the tart shells. If needed, cut out parchment rounds for the bottom.
- Dust the dough with flour and roll out the dough to fit the tart shells. Once the dough is in the shell, use the rolling pin over the top the tart pan to neatly cut the edges.
- Press holes into the tart dough all over the surface with a fork. Freeze the dough in the tart pans for 30 minutes.
- Preheat the oven to 350F.
- Bake the crust: If making mini tarts you can put them directly into the oven as is. If making a 9-inch tart, line the tart dough with foil and fill with pie weights.
- For mini tarts, bake for 15 minutes. For a 9-inch tart, bake for 10 minutes with the pie weights and then remove them and bake for 7-8 minutes more. Let cool to room temperature. When ready to fill, remove the tart shells from the pans.
Mascarpone Filling
- Mix the cheese: With a hand mixer, whip together the mascarpone cheese, cream cheese, and maple syrup. Set aside. In a new bowl, whip the heavy cream until you have soft peaks, about 1 minute. Once you see trails in the cream as you are whipping, start checking to cream to see if has soft peaks yet.
- Make whipped cream: In a new bowl, whip the heavy cream until you have soft peaks, about 1 minute. Once you see trails in the cream as you are whipping, start checking to cream to see if has soft peaks yet.
- Mix the filling: Fold in half of the whipped cream into the cheese mixture, folding until mostly combined. Then add the rest of the cream along with the vanilla and orange zest. Fold in until fully combined.
- Make Ahead: Don't put the cheese filling into the tart shell until shortly before serving. Cover tightly with plastic wrap and put it in the refrigerator until you are ready to use it. The filling can be made the night before. Just give it a stir before using.
Fruit Topping
- Fill the tarts: When ready to serve, fill the shell with the cheese and smooth it out.
- Add the fruit: Top with mixed berries, 12-15 per mini tart.
- Make the glaze: Heat the apricot jelly with 1 teaspoon of water until the jelly becomes liquid and starts to bubble. Then either strain the jelly into a bowl (if you don't want the bits of apricot in your tart), or use it directly from the pot.
- Either way, brush it over the berries with a pastry brush. You don't need to get every berry completely covered, but make sure you get a good coating over the berries.
Notes
- Superfine Sugar: To make superfine sugar from granulated sugar, put the sugar in the blender and puree for about 30 seconds.
- Greasing the Tart Pans: I butter both nonstick and regular metal tart pans. It only takes a moment and reduces the stress of getting the tart shell out.
- Make Ahead: If you fill the tarts too far ahead of time, the shells will become soft and crumbly. To prevent that, you can brush the shells along the bottom and up the sides with melted white chocolate to make a barrier.


Laura says
Haha, I definitely do NOT share these (and might even sneak one away for later next time! :P) Thanks for your tips on making the tart shells, this is something I’ve never attempted before and definitely used the advice haha. Never realised the glaze could be so easy too, with just a little apricot jam and water. Thanks!
justalittlebitofbacon says
Making tart shells does require a little practice to get comfortable with it, but I try to share what I’ve learned when I’ve screwed up. And the glaze is so easy! I was surprised too when I found that out.
Thalia says
These tarts are so fresh and delicious. Love mascarpone when paired with fresh berries.
justalittlebitofbacon says
Thanks! Mascarpone has such a light, fresh flavor that I knew I needed it once I decided on a cheese tart.
Sarah says
These are not only delicious but they are absolutely gorgeous!! They were perfect for Mother’s day! 🙂 Thanks for sharing!
justalittlebitofbacon says
Thank you! I do love the mixed berries on top. Pretty and delicious. 🙂
Lindy says
All my favs in one place. And your photos make it look so yummy I want to take a bite right now.
justalittlebitofbacon says
Thanks! I’m glad I made them as tasty looking as they were to eat. 🙂
peter says
Love the look of these. Nice pic too.
justalittlebitofbacon says
Thank you!
Marge Currier a.k.a. MOM says
This is a WINNER! The only sharing is the recipe.
Baked a cheesecake every Easter for your grandmother. Made another one for everyone else to share.
Love,
Mom
justalittlebitofbacon says
Thanks, mom! Yep, grandma never shared her cheesecake. 🙂 And with this recipe no one needs to share.
Marianne says
Looks like a perfectly balanced sweet treat! Love that classic combo of dairy and berries. I used to work in a bakery, and we exclusively used a mix of apricot and hot water to glaze all of our fruits — it adds such a nice final touch!
justalittlebitofbacon says
Thank you! I was trying for something lighter and balanced. And I’m glad to know that the apricot glaze is how the professionals do it.
Thao says
These berry fruit tarts are beautiful and the shells look so flaky and crumbly good! I love that they are mini size too!
justalittlebitofbacon says
Thank you! And I love mini desserts. No sharing. 🙂